Sinus Lift in Thailand Your guide to cost, top dentists & hospitals
A sinus lift creates the bone height your upper back implants need. Without it, those implants cannot go in safely.
What Is Sinus Lift?
Also known as: Sinus Bone Graft · Maxillary Sinus Floor Augmentation
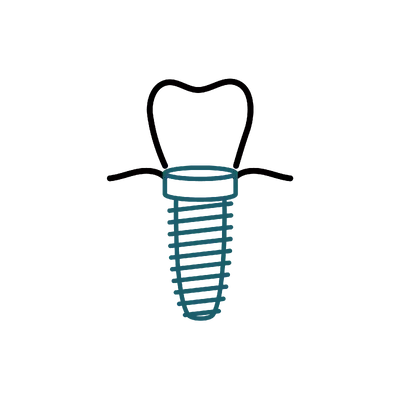
A sinus lift is a bone-grafting procedure that builds bone height in the upper back jaw by lifting the sinus membrane and packing graft material beneath it. Over the following months that graft becomes your own bone, creating the depth an implant needs to anchor safely. It is done under local anaesthesia in 1 to 2 hours, through either a small window in the side of the jaw (the lateral approach) or the implant socket itself (the crestal approach).
Being told you need one rarely means anything has gone wrong. When upper back teeth are lost the bone shrinks and the sinus drifts lower, so this step is common. Your dentist reads your bone height on a CT scan and picks the gentlest approach your anatomy allows.
Healing is steady, not instant. Larger lateral grafts usually take four to nine months to mature before implants go in, while smaller crestal lifts often allow the implant the same day. A follow-up scan, not a fixed date, confirms when your bone is ready.
It can address a range of concerns, including:
Am I a Good Candidate for Sinus Lift?
Suitability comes down to two questions a CT scan answers: how much bone height remains, and how healthy your sinuses are.
The measured bone height in your upper back jaw decides whether you need a sinus lift at all, and which technique suits you.
Below the implant threshold: The core indication is insufficient bone height in the upper premolar or molar region, usually after years of missing back teeth.
5-6mm decides the approach: With at least 5-6mm of native bone, a crestal lift with simultaneous implant placement is possible. Less than that points to a lateral window with staged implants.
One side or both: The scan shows exactly which sinuses need augmentation; bilateral lifts in a single session are routine for full upper arch plans.
A quiet, healthy sinus is a prerequisite, so existing sinus problems are addressed before the membrane is touched.
No active sinus disease: Chronic sinusitis, nasal polyps or allergies that flare easily need managing first, since the procedure works directly beneath the sinus membrane.
Previous surgery cleared: Earlier sinus surgery or head and neck radiotherapy requires clearance from your ENT specialist before planning goes ahead.
Strict pressure rules afterwards: No nose-blowing, closed-mouth sneezing or straws during early healing. The restrictions are stricter than other implant procedures, and you need to be able to follow them.
Membrane and bone healing drive the result, so specialists check for the factors known to compromise both.
Smoking raises specific risks: Heavy smoking impairs membrane healing and raises the risk of graft loss into the sinus cavity, so stopping around surgery is expected.
Bone-healing factors stable: Uncontrolled diabetes or recent IV bisphosphonate therapy affects bone regeneration around the augmented site and needs reviewing first.
Good general health: Patients should be free of active infections and well enough for a 1-2 hour procedure under local anaesthesia with sedation.
The result is structural rather than visible, and the timeline depends on which approach your anatomy allows.
No cosmetic change: A successful lift creates 8-12mm of usable bone height; the visible improvement comes later when the implant and crown are placed.
Four to nine months for lateral cases: Larger grafts mature slowly before implants can go in, while crestal cases get the implant in the same session.
Membrane tears are a known event: Small perforations occur in roughly 10-25% of lateral window cases and are usually repaired on the spot without changing the outcome.
Who is not suitable for sinus lift?
Pricing
How Much Will Sinus Lift Cost in Thailand?
How Thailand compares on cost, quality and reliability against leading destinations for sinus lift.
Is it better value in Thailand than in the USA?
Yes, comparable results at a fraction of the costThailand's leading hospitals are internationally accredited and its specialists highly experienced, so for most patients the results are comparable to those at home, at a fraction of the price. Here's how the cost breaks down by hospital tier.
Cost comparison by hospital level
| Hospital level | Your price in Thailand | Typical USA cost | You save |
|---|---|---|---|
| StandardAccredited hospital, experienced specialist | from ~$800 | from ~$2,400 | ~67% |
| PremiumLeading hospital, senior specialist | from ~$1,200 | from ~$3,600 | ~67% |
| LuxuryTop specialist, private concierge | from ~$1,600 | from ~$4,800 | ~67% |
Prices are indicative and shown in your local currency. You pay the hospital directly, with no markup.
How Thailand comparesHospital and surgeon standards
Accreditation
Specialist credentials
International experience
Thailand's advantages
- Save thousands on the same treatment and standard of care
- JCI-accredited hospitals and board-certified specialists
- Airport transfers and aftercare included, with hotels arranged nearby
- Little to no waiting list, so you plan around your travel
- A dedicated coordinator from first enquiry to flight home
Considerations
- Travel and time off work to factor in
- Follow-up care needs planning once you are back home
- Choosing the right hospital and surgeon matters most
Is it better value in Thailand than in the UK?
Yes, comparable results at a fraction of the costThailand's leading hospitals are internationally accredited and its specialists highly experienced, so for most patients the results are comparable to those at home, at a fraction of the price. Here's how the cost breaks down by hospital tier.
Cost comparison by hospital level
| Hospital level | Your price in Thailand | Typical UK cost | You save |
|---|---|---|---|
| StandardAccredited hospital, experienced specialist | from ~$800 | from ~$2,400 | ~67% |
| PremiumLeading hospital, senior specialist | from ~$1,200 | from ~$3,600 | ~67% |
| LuxuryTop specialist, private concierge | from ~$1,600 | from ~$4,800 | ~67% |
Prices are indicative and shown in your local currency. You pay the hospital directly, with no markup.
How Thailand comparesHospital and surgeon standards
Accreditation
Specialist credentials
International experience
Thailand's advantages
- Save thousands on the same treatment and standard of care
- JCI-accredited hospitals and board-certified specialists
- Airport transfers and aftercare included, with hotels arranged nearby
- Little to no waiting list, so you plan around your travel
- A dedicated coordinator from first enquiry to flight home
Considerations
- Travel and time off work to factor in
- Follow-up care needs planning once you are back home
- Choosing the right hospital and surgeon matters most
Is it better value in Thailand than in Australia?
Yes, comparable results at a fraction of the costThailand's leading hospitals are internationally accredited and its specialists highly experienced, so for most patients the results are comparable to those at home, at a fraction of the price. Here's how the cost breaks down by hospital tier.
Cost comparison by hospital level
| Hospital level | Your price in Thailand | Typical Australia cost | You save |
|---|---|---|---|
| StandardAccredited hospital, experienced specialist | from ~$800 | from ~$2,400 | ~67% |
| PremiumLeading hospital, senior specialist | from ~$1,200 | from ~$3,600 | ~67% |
| LuxuryTop specialist, private concierge | from ~$1,600 | from ~$4,800 | ~67% |
Prices are indicative and shown in your local currency. You pay the hospital directly, with no markup.
How Thailand comparesHospital and surgeon standards
Accreditation
Specialist credentials
International experience
Thailand's advantages
- Save thousands on the same treatment and standard of care
- JCI-accredited hospitals and board-certified specialists
- Airport transfers and aftercare included, with hotels arranged nearby
- Little to no waiting list, so you plan around your travel
- A dedicated coordinator from first enquiry to flight home
Considerations
- Travel and time off work to factor in
- Follow-up care needs planning once you are back home
- Choosing the right hospital and surgeon matters most
Is it better value in Thailand than in Singapore?
Yes, comparable results at a fraction of the costThailand's leading hospitals are internationally accredited and its specialists highly experienced, so for most patients the results are comparable to those at home, at a fraction of the price. Here's how the cost breaks down by hospital tier.
Cost comparison by hospital level
| Hospital level | Your price in Thailand | Typical Singapore cost | You save |
|---|---|---|---|
| StandardAccredited hospital, experienced specialist | from ~$800 | from ~$2,400 | ~67% |
| PremiumLeading hospital, senior specialist | from ~$1,200 | from ~$3,600 | ~67% |
| LuxuryTop specialist, private concierge | from ~$1,600 | from ~$4,800 | ~67% |
Prices are indicative and shown in your local currency. You pay the hospital directly, with no markup.
How Thailand comparesHospital and surgeon standards
Accreditation
Specialist credentials
International experience
Thailand's advantages
- Save thousands on the same treatment and standard of care
- JCI-accredited hospitals and board-certified specialists
- Airport transfers and aftercare included, with hotels arranged nearby
- Little to no waiting list, so you plan around your travel
- A dedicated coordinator from first enquiry to flight home
Considerations
- Travel and time off work to factor in
- Follow-up care needs planning once you are back home
- Choosing the right hospital and surgeon matters most
Is it better value in Thailand than in the UAE?
Yes, comparable results at a fraction of the costThailand's leading hospitals are internationally accredited and its specialists highly experienced, so for most patients the results are comparable to those at home, at a fraction of the price. Here's how the cost breaks down by hospital tier.
Cost comparison by hospital level
| Hospital level | Your price in Thailand | Typical UAE cost | You save |
|---|---|---|---|
| StandardAccredited hospital, experienced specialist | from ~$800 | from ~$2,400 | ~67% |
| PremiumLeading hospital, senior specialist | from ~$1,200 | from ~$3,600 | ~67% |
| LuxuryTop specialist, private concierge | from ~$1,600 | from ~$4,800 | ~67% |
Prices are indicative and shown in your local currency. You pay the hospital directly, with no markup.
How Thailand comparesHospital and surgeon standards
Accreditation
Specialist credentials
International experience
Thailand's advantages
- Save thousands on the same treatment and standard of care
- JCI-accredited hospitals and board-certified specialists
- Airport transfers and aftercare included, with hotels arranged nearby
- Little to no waiting list, so you plan around your travel
- A dedicated coordinator from first enquiry to flight home
Considerations
- Travel and time off work to factor in
- Follow-up care needs planning once you are back home
- Choosing the right hospital and surgeon matters most

Get a Free Dental Quote in Minutes
Tell us what you need and we'll match you with the right specialist and return real clinic quotes.
- Itemised clinic quotes with no hidden fees
- Matched to a dentist experienced in your specific treatment
- Completely free, even if you decide not to go ahead
Rated 5 stars by our patients
The complete guide to Sinus Lift in Thailand
Everything below is for readers who want the full detail: costs broken down, types and techniques, recovery, risks and safety, and planning your trip.
Top Sinus Lift Dentists & Clinics
Sinus lifts require a steady hand, detailed anatomical knowledge, and experience with membrane management. Here is what our partners bring.
Leading Clinics in Bangkok
Our partners have on-site cone beam CT scanners, piezoelectric surgical instruments (for precise bone cutting without membrane damage), and dedicated surgical suites for grafting procedures. The imaging, surgery, and follow-up all happen in the same facility.
Experienced Sinus Lift Surgeons
The oral surgeons and periodontists we work with perform sinus lifts as a routine part of their implant practice. They are experienced with both lateral and crestal approaches and know when each is appropriate. Many have training from European periodontology programmes where sinus augmentation is a core competency.
Integrating the Sinus Lift Into Your Implant Plan
Your dentist will explain how the sinus lift fits into your overall implant timeline. If a crestal approach is possible, the implant goes in during the same session. If a lateral window is needed, the implant follows after four to nine months of healing. Your coordinator schedules the follow-up CT scan and implant visit as part of a single coordinated plan.
Typical Results Over Time
Like bone grafting, the sinus lift result is structural, rebuilt bone height that makes implant placement possible.
Typical Sinus Lift Results
A successful sinus lift generates enough bone height between the jaw ridge and the sinus floor to safely anchor an implant, typically 8–12mm of usable bone. The grafted bone integrates with the native bone and functions identically for implant support. Confirmation comes from a follow-up CT scan showing adequate volume and density.
What Results Can You Expect?
The sinus lift itself produces no visible cosmetic change, the result is entirely structural. The visible improvement comes when the implant and crown are placed in the augmented bone. What the sinus lift gives you is the ability to have implants in the upper back jaw where it was previously impossible. Success rates in the published literature consistently exceed 95%.
Sinus Lift Cost in Thailand
Average Cost of a Sinus Lift
A sinus lift in Thailand typically costs $800–$1,600 per side. The crestal (closed) approach sits at the lower end, while a lateral window (open) sinus lift with a larger graft volume costs more. Bilateral sinus lifts, both sides in one session, run $1,600–$3,000 total.
Cost Breakdown
The price covers the surgical fee, bone graft material, barrier membrane, local anaesthesia with sedation, CT scan, and all follow-up appointments during your stay. Post-operative medications are included. If an implant is placed simultaneously during a crestal approach, the implant fee is additional.
What Affects the Price?
The technique is the main variable, a lateral window procedure takes longer and uses more graft material than a crestal approach. Bilateral treatment costs more than unilateral. The graft material type has a modest impact on price. If the sinus lift is combined with simultaneous implant placement, the implant cost is added separately.
Cost by Procedure Type
Typical ranges at our partner clinics in Thailand:
- Crestal sinus lift (with implant): $800–$1,200, minimally invasive, implant placed simultaneously
- Lateral window sinus lift: $1,200–$1,600 per side, larger graft volume, staged implant placement
- Bilateral sinus lift: $1,600–$3,000, both sides treated in a single session
- Implant placement (second visit): quoted separately based on number and type
Final pricing is confirmed after your consultation and CT scan.
Thailand vs International Price Comparison
A sinus lift costs $2,000–$4,800 per side in the US, A$2,250–A$4,400 in Australia, and £2,000–£4,000 in the UK. Thailand's $800–$1,600 per side represents a saving of 50–70%. When combined with implant treatment, the cumulative savings across grafting and placement add up to thousands of dollars.
Alternatives to a Sinus Lift
Not every upper back jaw needs a sinus lift. Where there is some height to work with, short implants can sometimes anchor in the bone that remains, and in full-arch treatment angled or tilted implants are often placed to grip the denser bone in front of the sinus, sidestepping the graft altogether. For severe upper jaw bone loss, zygomatic implants anchor in the cheekbone instead, again avoiding the sinus floor. Your dentist reads your CT scan to see whether any of these genuinely fit your case.
These routes are not a free pass, though. They depend entirely on how much bone you have and where it sits, so they suit specific anatomy rather than everyone. Short implants need a minimum height to be predictable, tilted and zygomatic implants are technique-sensitive and usually reserved for full-arch or severe cases, and choosing them to dodge a graft when your bone really does not support an implant simply trades one risk for another.
When your CT scan shows too little height in the upper premolar or molar region for any implant to anchor safely, the sinus lift is the route that actually creates the bone, turning a site where implants were impossible into one that holds them for the long term. That rebuilt bone is what the rest of this page covers.
Types of Sinus Lift
The approach depends on how much native bone remains. More bone means a simpler procedure. Less bone means a more involved one.
Lateral Window Sinus Lift (Open)
A small window is opened in the side wall of the upper jaw. The sinus membrane is carefully lifted upward and bone graft material is packed beneath it. The window is sealed with a membrane and the tissue is sutured closed. This approach allows large volumes of bone to be added.
- Can achieve significant bone height gain, enough for long implants
- Used when less than 4–5mm of native bone height remains
- Implants are typically placed at a separate visit after four to nine months of healing
- Best for: cases requiring substantial bone augmentation in the posterior maxilla
Crestal Sinus Lift (Closed/Internal)
A less invasive technique where the sinus floor is accessed through the same hole drilled for the implant. The membrane is gently elevated with specialised instruments and a small volume of graft material is placed. The implant is inserted in the same session.
- Minimally invasive with significantly less swelling and faster recovery
- Implant placed simultaneously, reducing the total number of procedures and trips
- Suitable when at least 5–6mm of native bone height is present
- Best for: cases needing only a few millimetres of additional height with adequate existing bone
Sinus Lift Techniques
The two sinus lift techniques differ significantly in invasiveness, recovery, and the clinical situations they suit. Here is how they compare.
Lateral Window Approach, Step by Step
An incision exposes the lateral wall of the maxilla. A small bony window is created using a piezoelectric instrument or a round bur. The sinus membrane is elevated using specialised curettes. Graft material fills the space. A membrane covers the window and the tissue is sutured closed.
- Piezoelectric instruments cut bone precisely without damaging the membrane
- Membrane perforation is the main intra-operative risk, manageable and repairable
- Healing takes four to nine months before implants can be placed
- Best for: cases needing maximum bone height gain where implant placement is staged separately
Crestal Approach, Step by Step
The implant osteotomy (the hole drilled for the implant) is extended to the sinus floor. A sinus osteotome or hydraulic lift technique gently pushes the floor upward along with the membrane. A small amount of graft material is introduced. The implant is placed in the same session.
- Performed through the implant site, no additional incision needed
- Shorter procedure and faster recovery than the lateral approach
- Limited to adding a few millimetres of height
- Best for: cases where 5–6mm of native bone exists and only modest height gain is needed
Bilateral Sinus Lift
When implants are needed on both sides of the upper jaw, both sinuses can be lifted in the same surgical session. This is common for patients planning full upper arch treatment. Both sides heal simultaneously, keeping the overall timeline efficient.
- Both sides treated in one appointment, one recovery period, not two
- Common for full-arch upper jaw implant planning
- Slightly more swelling post-operatively but same overall healing timeline
- Best for: patients planning upper implants on both sides who want to minimise the number of procedures
Sinus Lift Recovery Timeline
Days 1–3
Moderate swelling on the side of the face near the surgical site. Pain medication and antibiotics are prescribed. Do not blow your nose, sneeze with your mouth closed, or use a straw, pressure changes can disturb the healing membrane. Eat soft foods and sleep with your head elevated.
Days 4–7
Swelling begins to subside. Some nasal congestion is normal and resolves within a few days. Continue avoiding nose-blowing and strenuous activity. A follow-up appointment checks the surgical site and confirms you are healing well enough to travel home.
Weeks 2–6
Gum tissue heals over the surgical site. Sutures dissolve or are removed. Nasal congestion resolves. Normal activities resume but avoid heavy exercise that increases sinus pressure for at least four weeks. The bone graft is beginning to integrate beneath the sinus membrane.
Months 4–9
New bone has formed within the graft site. A follow-up CT scan confirms sufficient bone height and density for implant placement. Implants are placed during a second visit to Thailand. The lateral approach takes longer to heal than crestal, your dentist will set the timeline based on your scan.
When Can You Fly After a Sinus Lift?
Most patients can fly home 7–10 days after a sinus lift. Cabin pressure changes during flight are not a concern at this stage, but avoid excessive nose-blowing or Valsalva manoeuvres during the flight. If you experience any nasal congestion, use a decongestant spray as directed by your dentist.
When Can You Return to Work and Exercise?
Desk work can resume three to five days after surgery. Light walking is fine from day one. Avoid bending forward, heavy lifting, and any exercise that increases sinus pressure for at least three to four weeks. Swimming should wait until the surgical site is fully healed. The key is avoiding anything that raises pressure in the sinus cavity.
When Is the Bone Ready for Implants?
Crestal sinus lifts with simultaneous implant placement, the implant is already in. For lateral window cases, the graft needs four to nine months to mature. A follow-up CT scan confirms when the bone is dense enough for implant placement. Your coordinator schedules the implant visit based on the scan results.
Anaesthesia for a Sinus Lift
A sinus lift is done under local anaesthesia, so you stay awake but the area around the surgical site is fully numbed and you feel no pain during the procedure. Your dentist freezes the gum and bone of the upper back jaw before any work begins, and the surgical team monitors you throughout. There is no need for a general anaesthetic or a hospital stay for this step.
Because the procedure works directly beneath the sinus membrane, many people feel more relaxed with sedation alongside the local anaesthetic, and that option is available for anxious patients where it suits your case. Sedation keeps you calm and drowsy while still awake; your dentist and the clinic decide what is appropriate based on your medical history and how involved the lift is, whether it is a quick crestal approach or a larger lateral window.
Before surgery you have a consultation and CT scan, and any medications you take are reviewed so the plan is safe for you. During the lift you feel pressure and movement rather than pain, which is normal and not a sign anything is wrong. Afterwards, discomfort is mild to moderate, more an ache and swelling on that side of the face than sharp pain, and it is well controlled with the medication your dentist prescribes.
Risks and Safety of Sinus Lifts
Sinus lifts are among the most commonly performed bone augmentation procedures in implant dentistry. The technique has been refined over decades and the risks are well understood and manageable.
- Sinus membrane perforation during surgery (usually repairable)
- Sinusitis or sinus infection post-operatively
- Facial swelling and discomfort at the surgical site
- Graft failure, insufficient bone regeneration (can be regrafted)
- Temporary nasal congestion or minor nosebleeds
- Surgical site infection (uncommon with antibiotics)
The most common complication, sinus membrane perforation, occurs in roughly 10–25% of lateral window cases and is manageable intra-operatively. Small tears are repaired with a collagen membrane. Larger perforations may require postponing the procedure. Your dentist will explain the specific risks related to your anatomy.
Is a Sinus Lift Safe in Thailand?
Yes. Sinus lifts are routine at our partner clinics and are performed by oral surgeons and periodontists with specific training in sinus augmentation. The procedure has decades of published evidence supporting its safety and efficacy. JCI-accredited facilities ensure the surgical environment meets international infection-control standards.
How to Reduce Risks
If you have a history of chronic sinusitis, nasal polyps, or previous sinus surgery, disclose this during consultation, it affects planning. Avoid smoking before and after surgery. Follow post-operative instructions strictly, particularly regarding nose-blowing and pressure management. Complete the full course of antibiotics prescribed.
What If the Sinus Membrane Tears?
Small membrane perforations are common and manageable. The tear is patched with a collagen membrane and the procedure continues with adjusted technique. Large perforations, while rare, may require postponing the surgery to allow the membrane to heal before a second attempt. Your surgeon will make this call intra-operatively based on the size and location of the tear.
Planning Your Trip to Thailand for a Sinus Lift
A sinus lift is usually the first step in an upper jaw implant treatment plan. Here is how the trip logistics work.
How Long to Stay in Thailand
Plan 7–10 days for the sinus lift visit. Consultation and CT scan on day one. Surgery on day two or three. The remaining days cover recovery and a follow-up appointment. For crestal cases with simultaneous implant placement, the implant follow-up is included in the same stay.
What's Included in a Dental Trip
Your coordinator handles scheduling, transfers, and follow-up coordination. The treatment quote covers graft material, membrane, surgical fee, anaesthesia, CT scan, and all in-Thailand follow-ups. Flights and accommodation are separate. The coordinator can recommend nearby hotels.
The Two-Visit Timeline
Visit one: sinus lift (and possibly crestal implant placement). Visit two: implant placement for lateral cases, or permanent crown fitting for crestal cases, typically four to nine months later. The timeline depends on which approach is used and how quickly the graft matures. Your coordinator tracks the schedule and arranges the second visit when your bone is ready.
Alternatives to Sinus Lift
Other procedures that address similar goals or conditions. Compare before deciding which approach suits you.
Common Questions About Sinus Lifts
Everything you need to know before your treatment

Nick Peplow
EDITORIAL REVIEWPatient Care Director
Last reviewed: June 26, 2026
Medical References
- Boyne PJ, James RA. Grafting of the maxillary sinus floor with autogenous marrow and bone — Journal of Oral Surgery (1980)
- Pjetursson BE et al. Maxillary sinus floor augmentation: A systematic review — Journal of Clinical Periodontology (2008)
- Starch-Jensen T et al. A systematic review of long-term studies on sinus floor augmentation — International Journal of Oral and Maxillofacial Implants (2018)
- American Academy of Periodontology — Sinus Augmentation
- NHS — Dental Implants: Overview
Medical disclaimer: This information is for educational purposes only and does not replace professional dental advice. Individual results, recovery times, and suitability vary. Always consult a qualified dentist before making decisions about treatment.
Ready to Get Started?
Speak with our care coordinators for a free, no-obligation consultation and personalised quote.
Speak to Our Team